

Monday, November 28, 2011
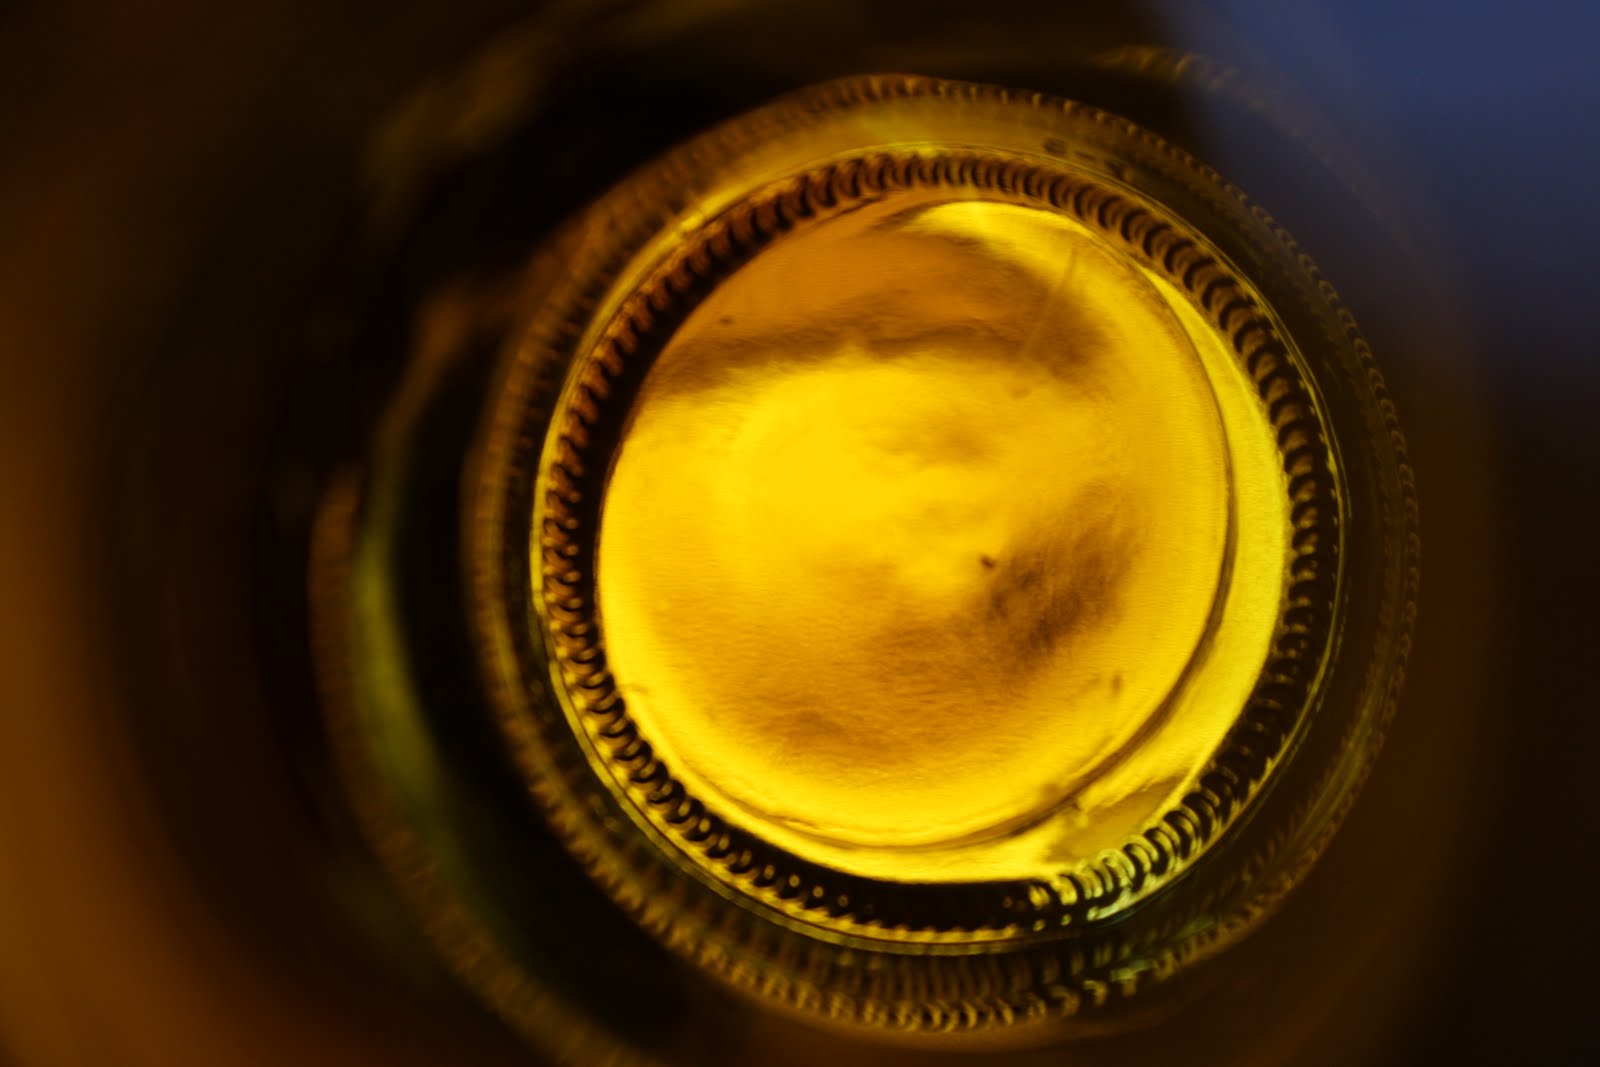
The Great Honey Brown Experiment
Sunday, October 23, 2011
RAMROD - Beer # 11
I was hoping to make an American Brown style beer with homegrown hops (thanks to Rod) but the LHBS did not have any Carafa Malt, so in a hasty decision, I went with Brown Malt. The beer turned more amber than brown due to the substitution and the taste will probably be considerably different. Definitely will not be as heavy or 'roasty' of a flavour profile but it should be reasonably biscuity/nutty due to the biscuit malt and my home toasted Oatmeal flakes that I added to the mash.
When coming up with this recipe, I thought about showcasing the hops that Rod gave me (Brewer's Gold and Willamette) but homegrown hops that haven't been tested can be fairly unpredictable and perhaps low in potency. That would be fine if I was making a summer session beer but winter is creeping up steadily so I figured I'd go the maltier way and produce a beer that would be more fitting for the Winnipeg Winter months.
My prediction for this beer: Low hop bitterness with a nice toastiness and a subtle nutty flavour. This should go very well with bacon and eggs.
RAMROD
4.65KG / 10.25LBS Domestic 2 row
.565KG /1.25LBSBiscuit Malt
.340KG /12OZBrown Malt
.260KG /9OZ Home Toasted Oats
60Grams / 2OzBrewers Gold Hops 60 mins
30Grams / 1OzBrewers Gold Hops 30 mins
8.5Grams / .3OzWillamette Hops 5 mins
(Rod's Willamette vine produced very little hop cones this year but his Brewers Gold was bountiful at about 9 ounces)
When coming up with this recipe, I thought about showcasing the hops that Rod gave me (Brewer's Gold and Willamette) but homegrown hops that haven't been tested can be fairly unpredictable and perhaps low in potency. That would be fine if I was making a summer session beer but winter is creeping up steadily so I figured I'd go the maltier way and produce a beer that would be more fitting for the Winnipeg Winter months.
My prediction for this beer: Low hop bitterness with a nice toastiness and a subtle nutty flavour. This should go very well with bacon and eggs.
4.65KG / 10.25LBS Domestic 2 row
.565KG /1.25LBSBiscuit Malt
.340KG /12OZBrown Malt
.260KG /9OZ Home Toasted Oats
60Grams / 2OzBrewers Gold Hops 60 mins
30Grams / 1OzBrewers Gold Hops 30 mins
8.5Grams / .3OzWillamette Hops 5 mins
(Rod's Willamette vine produced very little hop cones this year but his Brewers Gold was bountiful at about 9 ounces)
TASTING PARTY
Last week, I had a tasting party with 8 of my beers and 20 of my friends. All of the ales were paired with a delicious appy prepared by Chef Cindy of Peppercorn & Co. It was an awesome night with great feedback; Everybody loved the food and the beer and it was paced very nicely. There were a lot of people telling us that we should open a brewpub. That would be cool, but I need to perfect my craft a little more before I start considering that. Anyway, here are the beers used and their pairings.

 The beers praised the most were: The Ginger Beer (A lot of people thought it would be a perfect Christmas beer), The Mango Wheat, and the Mint Porter.


Sunday, September 25, 2011
Pumpkin Brew Day Turns into a Nightmare
This has been by far the longest, most frustrating brew day to date.
But I guess it is apropos for a Halloween beer to turn into a horror story.
I'll post the recipe and then explain what happened:
Hellish Halloween Harvest Beer
4.53 KG 10 LB Domestic 2 row pale
.43KG1LB Biscuit (Melanoiden) Malt
.22KG1/2LB Crystal Malt
2 small sugar pumpkins baked in the oven at 350 for one hour
2 orange sweet potatoes baked in the oven at 350 for one hour
I chose to mash the veggies instead of including them in the boil.
18 Grams / 1/2 Ounce Nugget Hops 60 mins
29 Grams / 1 Ounce Hersbrucker 5 mins
Wyeast 1275
(I bottled my British Mild tonight, and will rack on top of the yeast slurry)
I picked up my grains this morning and had my boys gut the sugar pumpkins and they had a great time doing it.
 Everything went according to plan until it was time to chill the beer and that's where it all fell apart. The immersion chiller sprung a leak and gave the beer about 3 extra gallons of cold water. There was a lot of swearing. The only choice I thought I had was to boil to reduce back down to 5 gallons. Well, 4 hours later, I was finally able to put it in the bathtub full of cold water. I didn't dare try fixing or using the immersion chiller ( that would be just asking for more trouble).
I didn't know what to do regarding the hops or what the best method would be so I threw in 18 grams of nugget at 60 mins left in the boil and 29 grams of Hersbrucker at flameout. I wonder what the double dosing of the wort with the additional hops will lend to the beer? I tried the sweet wort and it tasted like a baby bitter but unfortunately, I didn't get any pumpkin notes. Of course, you shouldn't judge a beer on the first day so I will wait and find out.
Well, it is 4 AM and I think it's finally reached its pitchable temperature. Then, I'm off to bed. This was my first 14 hour brew day. I hope that never happens again.
Everything went according to plan until it was time to chill the beer and that's where it all fell apart. The immersion chiller sprung a leak and gave the beer about 3 extra gallons of cold water. There was a lot of swearing. The only choice I thought I had was to boil to reduce back down to 5 gallons. Well, 4 hours later, I was finally able to put it in the bathtub full of cold water. I didn't dare try fixing or using the immersion chiller ( that would be just asking for more trouble).
I didn't know what to do regarding the hops or what the best method would be so I threw in 18 grams of nugget at 60 mins left in the boil and 29 grams of Hersbrucker at flameout. I wonder what the double dosing of the wort with the additional hops will lend to the beer? I tried the sweet wort and it tasted like a baby bitter but unfortunately, I didn't get any pumpkin notes. Of course, you shouldn't judge a beer on the first day so I will wait and find out.
Well, it is 4 AM and I think it's finally reached its pitchable temperature. Then, I'm off to bed. This was my first 14 hour brew day. I hope that never happens again.

Tuesday, September 20, 2011
Hop Harvesting
I was a little down when I realized that my hop vines were male. That meant there would be no cones for me to put in my beer and I would have to dig up all the rhizomes and try again next year. Luckily, my friend Rod had planted 2 hop varieties in May and in September, there were plenty of cones to be harvested. He also decided to donate those hops to me. I couldn't be happier.
 This variety is Brewer's Gold which yielded about 9 ounces of bittering goodness and the other hops netted only 1 ounce of Willamette.
I have a concern about this though:
Brewer's Gold is considered to be a bittering hop because it's supposed to have a neutral aroma (although there is a distinct nondescript smell to these hops), but all the literature I have read about home grown hops state that since you do not know the AA of the hops, it's best to use them as aroma hops at the end of the boil. I think I might just say 'the hell to you internet' and put 2 ounces of BG at 60 minutes, 1 ounce of BG at 30 minutes and 1 ounce of Willamette at the end of the boil. I will report back and see how that works. It won't be for a while though since I will be making a harvest beer next.
Thursday, September 15, 2011
Triple Split Brew (Mild, Ginger, Pumpkin Pie)
Last weekend, I brewed 8 gallons of wort to get one 5 gallon carboy of British Mild, one 1 gallon growler of Pumpkin Pie beer, and one 1 gallon jug of Ginger beer:
British Mild
5.45KG 12LB Maris Otter 2 Row
.45KG 1LB Crystal 45 L Malt
60GR 2OZ Fuggles hops at 60 minutes
1275 Thames Wyeast
Nothing fancy there for the mild. It has just a little bitterness (29 IBU) but no flavour hops. I wanted to keep that end pure so when I added the adjuncts for the other beers, they wouldn't be competing with the aroma hops. This is also the first time trying Maris Otter and I wanted to see what it actually tasted like.
Ginger Beer: Near the end of the boil, I transferred about a gallon of wort into another brew pot and added a 1/2 tsp of lime zest at 5 minutes left then about 1/2OZ of grated ginger root at flameout.
Pumpkin Pie Beer: I mixed together3/4teaspoon of McCormick mixed spice,1/4teaspoon Cinnamon, 3 teaspoons dextrose into a cup with some water and microwaved that for about a minute. I put the mixture into a 1 gallon carboy and racked the British Mild into it.
5.45KG 12LB Maris Otter 2 Row
.45KG 1LB Crystal 45 L Malt
60GR 2OZ Fuggles hops at 60 minutes
1275 Thames Wyeast
Ginger Beer: Near the end of the boil, I transferred about a gallon of wort into another brew pot and added a 1/2 tsp of lime zest at 5 minutes left then about 1/2OZ of grated ginger root at flameout.
Pumpkin Pie Beer: I mixed together3/4teaspoon of McCormick mixed spice,1/4teaspoon Cinnamon, 3 teaspoons dextrose into a cup with some water and microwaved that for about a minute. I put the mixture into a 1 gallon carboy and racked the British Mild into it.
Tuesday, August 30, 2011
Sad Day in Hopville
Remember that hopvine that was growing in my garden when I moved in? Well, as far as the internet goes, my vine is a male plant.

I was excited about my new "find" but now I realize that I have to dig up all those rhizomes come fall and prepare an area for new and improved female rhizomes. At least I'll probably know what type of hops they are.

I was excited about my new "find" but now I realize that I have to dig up all those rhizomes come fall and prepare an area for new and improved female rhizomes. At least I'll probably know what type of hops they are.
Friday, August 19, 2011
SPLIT BREW (PORTERS)
I have decided to make two beers this weekend. One regular 5 gallon Mint Porter and one 1 gallon Vanilla Porter. I am using the same recipe for both and will be augmenting the grain bill to reflect a 6 gallon batch. I will put the mint/vanilla bean in after primary fermentation is complete.
MINT PORTER / VANILLA PORTER
4.87 KG / 10 LB 12 OZ Domestic 2 Row
.39 KG / 14 OZ Chocolate Malt
.39 KG / 14 OZ Oats (Quaker - cooked before I added it to the mash)
29 G / 1 OZ Golding Hop 60 Min
29 G / 1 OZ Golding Hop 20 Min
They were out of Golding so I picked up some nugget instead. It's pretty intense at 12.2 AA so I am just going:
20 G of Nugget 60 mins
1335 reharvested Wyeast
1.5 Oz of Vietnamese Mint from the garden
1/4 bean Vanilla Bean.
I will soak each adjunct in some Vodkaor Bourbon 24 hours before placement in primaries.
MINT PORTER / VANILLA PORTER
4.87 KG / 10 LB 12 OZ Domestic 2 Row
.39 KG / 14 OZ Chocolate Malt
.39 KG / 14 OZ Oats (Quaker - cooked before I added it to the mash)
29 G / 1 OZ Golding Hop 20 Min
They were out of Golding so I picked up some nugget instead. It's pretty intense at 12.2 AA so I am just going:
20 G of Nugget 60 mins
1335 reharvested Wyeast
1.5 Oz of Vietnamese Mint from the garden
1/4 bean Vanilla Bean.
I will soak each adjunct in some Vodka
Friday, July 29, 2011
Mango Wheat Beer
I was going to make a Strawberry Wheat beer, but my wild strawberries did not fruit this year. They took over my garden, flowered and then went to seed. I was a little disappointed, but decided to go another route and bought a box of mangoes. I have 6 mangoes cut up and waiting patiently in the freezer for their time in the secondary.
This is my first time using wheat and I hope my gravity reading is not too low. I will have some sugar or honey near by just in case.
From my research, I learned that you should mill the barley and wheat grains separately because the wheat is a small grain and might not get an adequate crush.
I had a difficult time figuring out what flavour route I should take. Mango is a subtle, delicate flavour that might not always shine through. So, instead of trying to make it the big taste, I decided to try to complement the fruit with something else. If I was to use a German Wheat yeast, I would probably get some banana notes (if I fermented at a higher temperature) and mango banana is a tasty combination. Citrus also goes well with mango. After much deliberation, I decided on a neutral American wheat yeast and Amarillo hops. I wanted to do Citra Hops, but they were not available at the beer store. It has been said that Amarillo can taste mangoey so the combination should really bring out the mango.
Here is my recipe:

Mickey Mango Wheat beer
2.72 KG / 6 LB of Domestic 2-row
2.00 KG / 4 LB 8 Oz of Wheat malt
.34 KG / 12 OZ of Crystal 10L
21 Grams / .75 OZ of Amarillo 60 mins
21 Grams / .75 OZ of Amarillo 1 min
15 Grams / .50 OZ of Amarillo dry hopped 7 days
Wyeast 1010 (American Wheat)
6 Mangoes in Secondary.
Tuesday, July 19, 2011
B(re)aking Beer Bread with the Boys.
I found an excellent recipe for beer bread at the Northern Brewer Blog page. I pulled out a sample of my newest beer, The Golden Ale for a hydrometer test and took a pint more for the bread. It was a tasty, non-carbonated beer that I thought would be perfect for the recipe. My twin boys helped me make the bread and they were very excited about it. I have decided to make beer bread every time I bottle. Such a great idea and I definitely recommend trying this. Here are some photos of the process:


Saturday, July 9, 2011
It's Time for a Cream Ale
Sure, it is a light, fluffy drink with little to no character, but there is a challenge to the process. Fuller-bodied beers can mask any off flavours that can appear due to poor sanitation and careless technique but a
Another characteristic of a
Usually, The
4.08 KG / 9 LBS Domestic 2 Row
.90 KG / 2 LBS Vienna Malt
.
.30 KG / 1/2 LB Crystal Malt 10L
20 grams centennial 60 min
15 grams saaz 10 min
29 grams saaz 1 min
Harvested 1098 British II Yeast
I have a feeling that this will have a little more character than the normal
Wednesday, July 6, 2011
Bottle Design is Important.

I bottled the Citrus City Ale last night and I came to the conclusion I will be throwing some bottles away. I use a butterfly capper for bottling and it works much better with deeper ridged bottles.

This bottle does not have a deeper ridge. No leverage leads to a greater potential of cracking the bottle.

I have a couple bottles that gave a little crunch as I was capping it. I haven't thrown those away, it may still be good.
So, all Anchor Steam and poorly designed bottles will get the turf treatment.
Saturday, July 2, 2011
Update on Beer Garden

Well, as long as I get hops to make at least one batch, I will be happy.
Sunday, June 26, 2011
Tasting Party
People like my beer. There are the odd unenlightened souls that remark on the turbidity and sediment and can't get past that to enjoy the taste of the beer, but for the most part people really like my beer.
I have decided to have a tasting party in October to share the flavours of my homebrew. I should be able to make a few more batches by then.
So far, I have:
Honey Basil Ganglia in a 750ml champagne bottle. 750ml
Citrus City Ale in a 2 liter plastic bottle. 2000ml
Golden Ale in a 2 liter plastic bottle and 750 ML bottle. 2750ml
Mango Wheat in a 2 liter plastic bottle and 750 ML bottle.2750ml
Mint Porter in a 2 liter plastic bottle and 750ml bottle. 2750ml
Vanilla Porter a 2 liter plastic bottle.2000ml
British Mild in primary
Ginger Beer in primary
Pumpkin pie spice beer in primary
To be made: (as of July 8th, it has changed and will probably change considerably until the last beer before the party, so I am going to list the ones I want to make and cross off the ones that will be eliminated from the party)
Cream Ale Golden Ale
Strawberry Mango Wheat
Chocolate Mint Porter / Vanilla Porter
Blonde or Pale (my own hops)
British Mild
Pumpkin AlePumpkin Pie Spice Beer
Ginger beer
I have decided to have a tasting party in October to share the flavours of my homebrew. I should be able to make a few more batches by then.
So far, I have:
Honey Basil Ganglia in a 750ml champagne bottle. 750ml
Citrus City Ale in a 2 liter plastic bottle. 2000ml
Golden Ale in a 2 liter plastic bottle and 750 ML bottle. 2750ml
Mango Wheat in a 2 liter plastic bottle and 750 ML bottle.2750ml
Mint Porter in a 2 liter plastic bottle and 750ml bottle. 2750ml
Vanilla Porter a 2 liter plastic bottle.2000ml
British Mild in primary
Ginger Beer in primary
Pumpkin pie spice beer in primary
To be made: (as of July 8th, it has changed and will probably change considerably until the last beer before the party, so I am going to list the ones I want to make and cross off the ones that will be eliminated from the party)
British Mild
Ginger beer
Saturday, June 18, 2011
BEER #5: Orange Copper Ale (Citrus City Ale)
I found this recipe at brewingkb.com. It is a very well-received recipe that has gotten a lot of rave reviews and recommendations. So, I figured I give it a try. I don't really care about replicating a brewery beer so if it is not like the African amber, I could care less. I have made two changes; I used a lighter colour crystal and added a pound of base malt. My beers have been on the darker side as of late and I want to add some latitude in my colour spectrum. The crystal 45L will give it some colour but hopefully not too much.
The two things that I haven't done yet are: add orange and dry hop.
 Citrus City Ale: 5 gallon batch
4.53 KG / 10 LBS 2 row pale
.45 KG / 1 LB Munich
.22 KG / 1/2 LB Crystal 45
29 G / 1 OZ Centennial 60 min
29 G / 1 OZ Dried Orange peel 30 min
29 G / 1 OZ Cascade 1 min
29 G / 1 OZ Dry hop Cascade 7 days after primary
1098 Wyeast British Ale
In hopville.com, it states the OG should be 1.058 and the F.G 1.015. I've always had problems with my efficiency so I'll be focusing on extracting as much sugar as possible. I also haven't decide whether I'll dry hop in the primary or rack it to a secondary and then dry hop. I do plan on reusing the yeast because it is very cost effective that way.
The two things that I haven't done yet are: add orange and dry hop.

4.53 KG / 10 LBS 2 row pale
.45 KG / 1 LB Munich
.22 KG / 1/2 LB Crystal 45
29 G / 1 OZ Centennial 60 min
29 G / 1 OZ Dried Orange peel 30 min
29 G / 1 OZ Cascade 1 min
29 G / 1 OZ Dry hop Cascade 7 days after primary
1098 Wyeast British Ale
In hopville.com, it states the OG should be 1.058 and the F.G 1.015. I've always had problems with my efficiency so I'll be focusing on extracting as much sugar as possible. I also haven't decide whether I'll dry hop in the primary or rack it to a secondary and then dry hop. I do plan on reusing the yeast because it is very cost effective that way.
Friday, June 10, 2011
Cautions for next batch.
I've noticed a couple of things that shouldn't be happening with my beer making process:
1. My efficiency is really poor.
2. It seems that I am bottling way less than 5 gallons of beer.
With my Irish red, I pulled out a gravity reading of 1.030 where it should have been 1.050. The Honey Basil was a better 1.042. I ended up throwing in a bunch of honey for the red to boost the sugar content because I don't want an ABV of 3%. I left the Honey Basil as it was and I pulled out an ABV of 4.6% for that one.
I have been struggling with hitting my target Mash temp. I'm going too low. I'm usually off about five degrees. The Cali B had a nice OG (still lower than it should be) but I hit the target temp. The other thing I don't do is stir the mash every 20 minutes. The web has paranoid me in believing that even the littlest bit of stirring will cause hot side aeration (tastes like wet cardboard). Hopefully some gentle stirring will release those sugars.
What I'm going to do different next time:
A. Stir every twenty minutes.
B. Use a 2:1 water to grain ratio.
C. Do not Mash Out.
D. Drain as slowly as possible.
E. Watch my temps carefully.
My next problem is the lack of beer. I didn't really pay close attention to the exact level of beer that reached the bottling bucket but it seems I'm missing about a gallon and a half. At least that was the problem with the Honey Basil. I added 5 ounces of dextrose to the bottling bucket thinking I was going to be bottling five gallons. Hopefully I don't get bottle bombs. That would blow.
I already marked the bottling bucket at the 5 gallon mark and will get a strip for the carboy.
A. Get a 6.5 Gallon boil going to get a 5.5 gallon batch.
B. Don't be afraid to top up with water if low.
C. Measure
D. Get a bigger funnel to pour the wort into carboy.
E. Waste less wort fluid into carboy
Thursday, June 2, 2011
Irishish Red Update

It had attenuated right out with the OG 1.050 and FG 1.004 so I know the yeast converted all the fermentable sugars.
There was a mild heat wave and it caused the linen closet to heat up to 73 degrees F. So, that may have been the problem.
I will be cracking open a beer every 3 days to see what it has changed into.
I am happy to report that the beer has debananaified considerably and is not too bad of a beer. A little thin but smooth and easy drinking.
Friday, May 27, 2011
Brew #4: My Own Recipe
Exciting times when you become confident enough to create your own recipe. This doesn't adhere to any style that I know of but me just wanting to try different malts.
This time, Dark Munich and Honey Malt are the stars of this bill. Honey malt is a crystallized malt that should add an intense sweetness to the brew. I am only using 6% HM so it shouldn't be too overbearing which is good because I am not a big sweet fan (I love black coffee). The Dark Munich will not give you a dark beer but will enhance the aroma and taste of these beers. Some descriptors that I have researched are: biscuit, honey, nut, and caramel. As it stands, it looks like this is going to be a sweet, full bodied gold-copper coloured beer.
UPDATE: Things change during brewday and this is no different. I added Basil and 1/2 Oz of Mt Hood hops at 5 min left. I blogged about experimental beers earlier and a honey basil idea was included in that blog. So, what the hell.
Basil Ganglia Ale (musician I knew)
9LB / 4.08 KG Domestic 2 row
1.5LB / .67 KG Dark Munich
12OZ / .34 KG Honey Malt
8OZ / .22 KG Flaked Barley
1OZ / 29G Goldings 60 Min
1OZ /29G Goldings 20 Min
.5OZ /14.5G Mt Hood hops 5 Min
a bunch of Cinnamon Basil 5 Min
I will be reusing 1335 yeast from the Irish Red. Reusing yeast (if it works) is awesome because it reduces the costs considerably. This is also the first time I am attempting this.
Monday, May 23, 2011
Bottling Sucks
Yes, it does.
If I had the money to get into kegging, I would be all over it, but unfortunately, that is not feasible at this time.
I usually start cleaning the bottles the day before. I funnel small amounts of bleach into the bottles, fill it up with hot water and wait for a couple hours. I rinse them out at least three times to make sure there is no chlorine remnants (not interested in beer smelling and tasting like bandages). After that, I pour sanitizer into each bottle shortly before bottling.
I then get the bottling bucket cleaned out, prepare priming sugar, transfer the beer into then bucket, then get ready to bottle.
 Yesterday, my bottle wand filler broke as I was trying to insert it into the auto siphon just before I was to fill the bottles. A bunch of scenarios ran through my mind as to what I should do. Sunday night and stores aren't open, should I just forget about the filler and siphon without it but I envisioned the waste of beer and quickly scrapped that idea. I just used the shorter length of the filler. I had to hold the bottle up instead of having it on the floor.
Capping is pretty easy and I don't mind that but with a keg you clean it and siphon the beer into it, force carbonate and let condition.
A four to six hour process down to a max two and less chance of infection...hmmm.
Too bad I don't have the money for it.
If I had the money to get into kegging, I would be all over it, but unfortunately, that is not feasible at this time.
I usually start cleaning the bottles the day before. I funnel small amounts of bleach into the bottles, fill it up with hot water and wait for a couple hours. I rinse them out at least three times to make sure there is no chlorine remnants (not interested in beer smelling and tasting like bandages). After that, I pour sanitizer into each bottle shortly before bottling.
I then get the bottling bucket cleaned out, prepare priming sugar, transfer the beer into then bucket, then get ready to bottle.

Capping is pretty easy and I don't mind that but with a keg you clean it and siphon the beer into it, force carbonate and let condition.
A four to six hour process down to a max two and less chance of infection...hmmm.
Too bad I don't have the money for it.
Saturday, May 14, 2011
Irish Moss

Some other info regarding clarity of the beer (culled from online sources): make sure you chill the wort as quick as possible, crash cool the beer after the fermentation process is complete, and strain your beer before fermentation. A lot of these steps could be very well undone by the phenomenon of 'chill haze' which occurs when you put your beer into the fridge to chill. When you remove and pour the beer, the refreshing liquid has become hazy. Apparently, if you leave the beer in the fridge for over a month, the haze causing proteins eventually settle out leaving the brew with a nice clarity.
The important thing to realize is that haze DOES NOT affect the taste of the beer just the appearance. Also, if you are entering it in a competition, you will lose one point overall for clarity.
Red Ale Update
I brewed the red on Tuesday after the boys went to bed. I started the process at 6:30 PM and crawled into bed at about 2:00 AM. This brew did not go to plan. That's funny because so far only my first beer went off without a weird hitch. This time my efficiency sucked. For some reason, I couldn't get my mash temperature above 146f. The sugars didn't convert properly and I received an OG of 1.030 which would give a maximum ABV of 3.9% and probably end up as 3%. Unacceptable. I had no other option but to raid the pantry for some tasty fermentables. I decided upon 1 1/2 cups of wildflower honey. I added the honey at 15 minutes left in the boil. My OG turned out to be 1.050 / max 6.4% ABV. That's a lot better and the wort tasted nice. The recipe called for .5 OZ of Goldings hops at the end of the boil and in an impulsive move, I threw in an ounce instead. The hops I buy come in 2 Oz packages so I decided not to save the hops for a few months down the road but to use it now. The yeast is presently doing its job. Looking forward to trying it.
Sunday, May 8, 2011
Wah! Wah! Sassafras Red
It's almost an Irish red but I decided on using domestic Manitoba malt instead of the traditional Maris Otter or UK malt and it is .75 cents/kg cheaper than MO. This time I am using Flaked Barley and chocolate malt to give it some head and body. The flaked barley supposedly will give the beer a grainy taste and will lend excellent head retention. The chocolate malt is my 'character' malt that should impart complex vanilla/caramel flavours. The Irish moss that I will be adding will add clarity to the brew. However, the flaked barley might give it a hazy appearance.
I am making this for a party that is happening in about a month. Hopefully, it will be conditioned enough for the event. I also have a 2 liter bottle of my California Bastard saved for the event.
 KG LB
KG LB
4.08 9 Domestic 2 row
.335 .75 Flaked Barley
.23 .50 Crystal 77 L
.07 .12 Chocolate Malt
30G 1 OZ Goldings Hops 60 min
30G 1 OZ Goldings Hops 5 min
1 1/2 cups honey to raise the poor OG of 1.030
1 TSP Irish Moss 15 min
The photo above is of Flaked barley.
I am making this for a party that is happening in about a month. Hopefully, it will be conditioned enough for the event. I also have a 2 liter bottle of my California Bastard saved for the event.

4.08 9 Domestic 2 row
.335 .75 Flaked Barley
.23 .50 Crystal 77 L
.07 .12 Chocolate Malt
30G 1 OZ Goldings Hops 60 min
30G 1 OZ Goldings Hops 5 min
1 1/2 cups honey to raise the poor OG of 1.030
1 TSP Irish Moss 15 min
The photo above is of Flaked barley.
Monday, April 25, 2011
Growing Hops
Well, this is the time of year that blogging brewers talk about growing hops. Now it's my turn.
When we moved into our house 3 years ago, there was a prickly vine growing on the north side of the house. I liked that vine. It grew on my chain link fence giving an excellent privacy cover.
It wasn't until this year in January when I started my beer research that I realized this was a hop vine. Because it was on the north side, there were no flowers and I never thought it was anything but a random vine.
I am now in the process of digging up some rhizomes/rootings of the vine and transferring it to the west side of the house where there is plenty of sun.
My big question is: What the hell type of hops is this? I found this website which shows the different types of hop cones. I guess I might have to wait till the fall before I can figure out what variety it is.

Friday, April 22, 2011
Cali Common Ale Update
Last night, I pulled out a sample of my Cali Ale for a hydrometer reading and a taste. The OG was 1.050 and the FG is 1.006 which makes a 5.7% ABV. I was really quite worried about that since my first yeast was a failure and I just pitched the American Ale Yeast straight in the fermentor without a starter.
There were also no off flavours or weird tastes. At first, I thought there was a skunky taste but Stefanie told me that I was just trippin' and it was just a hoppy taste.

I'm cleaning the bottles now and will be bottling in the next couple of days.
There were also no off flavours or weird tastes. At first, I thought there was a skunky taste but Stefanie told me that I was just trippin' and it was just a hoppy taste.
I'm cleaning the bottles now and will be bottling in the next couple of days.
Tuesday, April 12, 2011
Future Brews
It's finally Spring here in Winnipeg and it's time to think about what I'm going to plant this year. Now that beer is constantly on my mind (read obsession), I'm going to gear some of my plantings for some experimental brews. Here are some of the plants that I have started indoors:
 Small Sugar Pumpkin
I definitely plan on making a PUMPKIN ALE this fall. I have to do a lot of research on this one because there are a variety of brewing techniques.
 Spearmint
Since I enjoy porters and stouts, I am going to try a CHOCOLATE MINT PORTER/STOUT
 Cinnamon Basil
Although, I have never tried this, I believe a HONEY BASIL beer would yield a nice refreshing brew. Well, Bison Brewing does it, so I can as well.

I definitely plan on making a PUMPKIN ALE this fall. I have to do a lot of research on this one because there are a variety of brewing techniques.
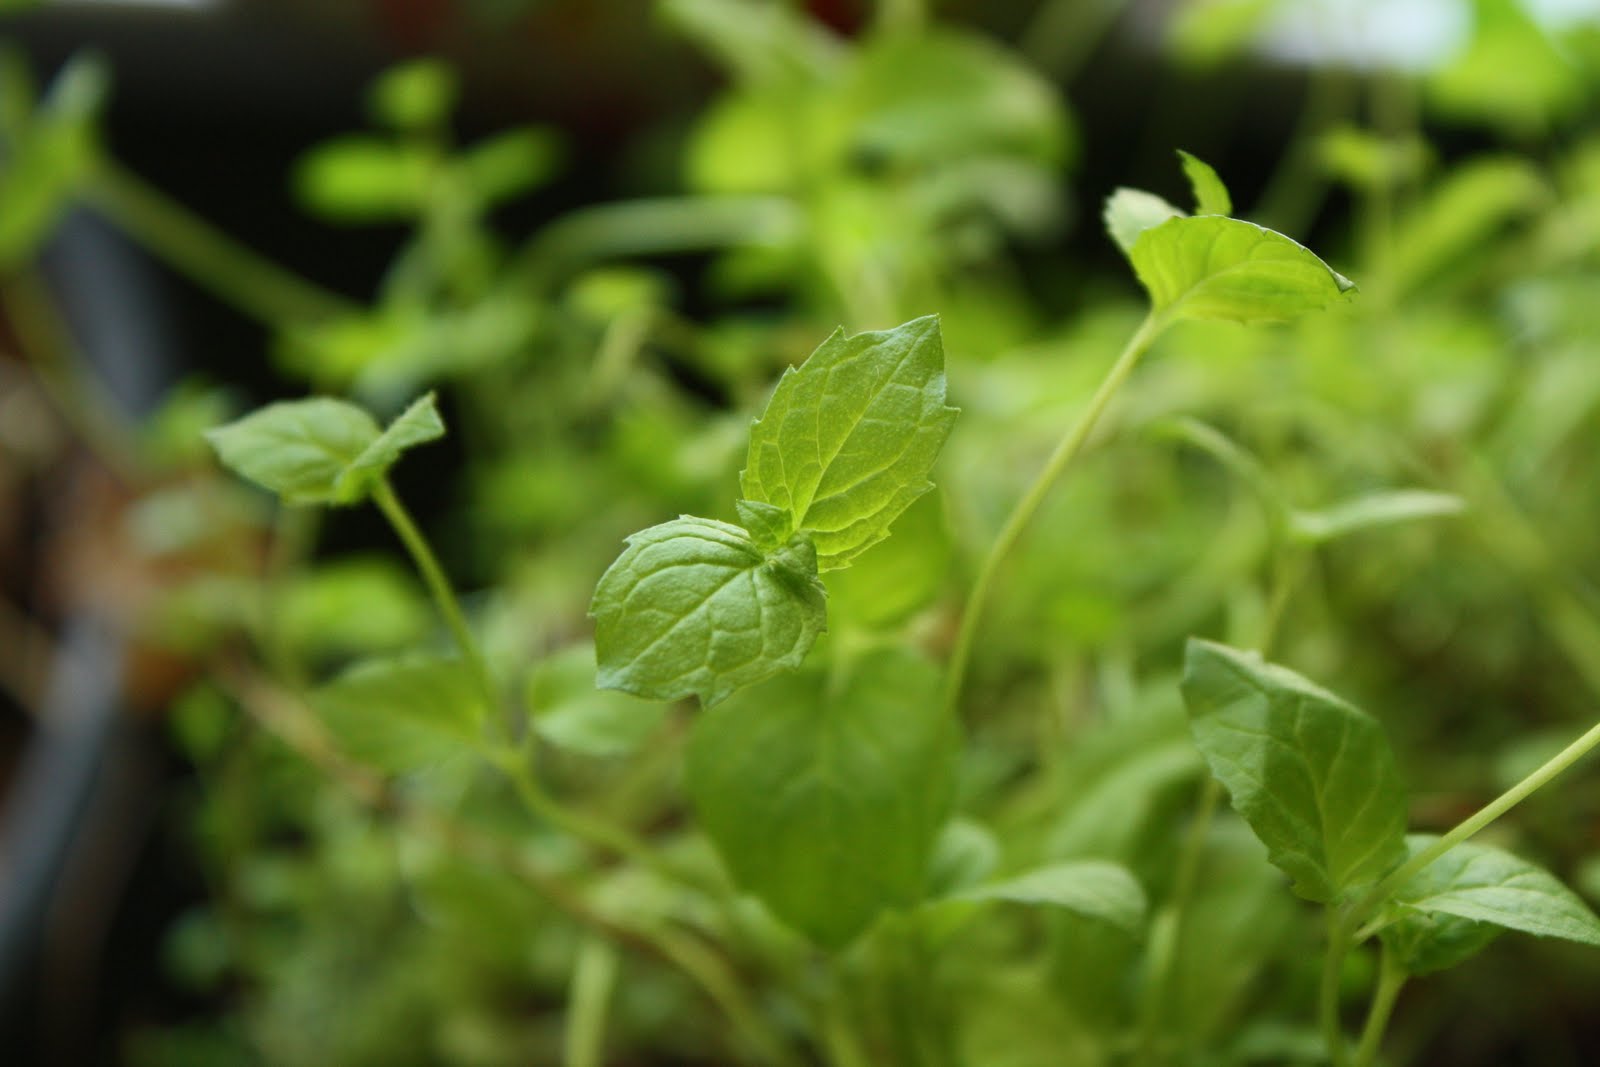
Since I enjoy porters and stouts, I am going to try a CHOCOLATE MINT PORTER/STOUT

Although, I have never tried this, I believe a HONEY BASIL beer would yield a nice refreshing brew. Well, Bison Brewing does it, so I can as well.
A Rocky Start
After the stress of a failed Yeast starter, the beer is now fermenting. 12 hours after I pitched the new pack of yeast, the airlock was chugging away once every four seconds. 16 hours past - once every two seconds. The krausen looks pretty good and there's no weird odours. So far, so good. Fingers crossed though.

I'm not sure what I'm going to call this beer. Hopefully, not "sink drink". It is not a Cali - Common anymore, it is more of a Bastard Aleger.

I'm not sure what I'm going to call this beer. Hopefully, not "sink drink". It is not a Cali - Common anymore, it is more of a Bastard Aleger.
Monday, April 11, 2011
Cali Common Yeast Starter
I sure hope I didn't bung this up. I smacked the WYeast 2112 at noon and by 6:00PM, there was no expansion in the packet. I went to MrMalty.com and it told me to make a 2.1 liter starter. That seems like a lot. I am also worried because I didn't notice the manufacture date of the yeast when I bought it. It was October 20, 2010. Wyeasts are good for 6 months after the manufacture date.
I did a gravity readings of the starter: O.G 1.050 F.G 1.050. I pitched it anyway. 17 hours later, there was absolutely no activity - so I emailed the beer store and the owner replied with: "The best advice I can give you is to get a viable yeast into that beer as soon as you can. Even getting a dried yeast in there is better than leaving it longer. If it sits for too long without activity there is a greater chance for bacterial spoilage"
So, as soon as my wife came home from work, I raced out of the house, drove across the city in rush hour and picked up another pack of Wyeast. Instead of the Cali-Lager, I picked up the American Ale Yeast. My first beer used that yeast and it turned out fantastic. I smacked it in the car, and by the time I got home, it was already starting to inflate. I quickly sterilized everything I needed to and pitched the yeast.
I sure hope I didn't bung this up.
Monday, April 4, 2011
Beer Number Two (Cali Ale/Lager)
For me, the hardest part of brewing is choosing the recipe or style of beer. When I racked my Honey Amber (which I am now calling Buzz Bomb because it is 7.3% ABV)to the secondary, I harvested the yeast. I wanted to use the yeast for another American Amber or Brown but I also wanted to make a California Common. Wyeast 1056 is a nice multi-purpose yeast that can be used for many different styles except a Cali Common (Lager yeast). So, I decided to reuse my yeast, but then everything came to sudden halt while writing this entry. I typed in harvesting yeast in my search engine and found out something interesting: It is not recommended to reuse yeast with an ABV of 6.5% or higher.
Cali Common it is. Here is a recipe I found on Hopville.com:
California Common California Bastard
4.53 KG / 10 LB of 2 row pale
.45 KG / 1 LB of Caramel/Crystal Malt 60L
.22 KG / 8 OZ of Biscuit
28.5 Grams / 1 OZ Northern Brewer Hops at 60 Mins
14.5 G / .5 OZ Northern Brewer at 30 Mins
14.5 G / .5 OZ Northern Brewer at 1 Min
WYeast2112 1056
Est OG 1.058
Est FG 1.018
I think this time I should skip the racking to secondary and just bottle after 3 weeks in primary.
Cali Common it is. Here is a recipe I found on Hopville.com:
4.53 KG / 10 LB of 2 row pale
.45 KG / 1 LB of Caramel/Crystal Malt 60L
.22 KG / 8 OZ of Biscuit
28.5 Grams / 1 OZ Northern Brewer Hops at 60 Mins
14.5 G / .5 OZ Northern Brewer at 30 Mins
14.5 G / .5 OZ Northern Brewer at 1 Min
WYeast
Est OG 1.058
Est FG 1.018
I think this time I should skip the racking to secondary and just bottle after 3 weeks in primary.
Sunday, March 13, 2011
My Mashtun
Saturday, March 12, 2011
Today, I built the mashtun.
 My friends Erin and Tim gave me a used 48 Liter cooler (thanks) and I bought 5 feet of food grade hosing with a 3/8' Inner diameter and 1/2' outer. The tube fits very snugly and on the other side, I attached a gutted, stainless steel toilet supply connector. Make sure you get that instead of some other water supply hose. I made that mistake and I couldn't get the inner tube out. It was a black flexible hose. I spent about 2 hours trying to take that tube out until I cursed and gave up. I had watched a few 'making ofs', and it was never that difficult to remove.
 I went to the hardware store to get another. An employee tried to give me a hand but he never gutted a supply hose before. He wished me luck and moved on quickly.
I found a hose that fit the bill and I bought it. It took me about 5 minutes to remove the tube. What a waste.
Oh well.
I clamped the hoses together and I'm done.
Stefanie thinks my hose looks sad but it did the job well and did not get stuck.
Here are a few pics of the Mashtun in action.


Today, I built the mashtun.


I found a hose that fit the bill and I bought it. It took me about 5 minutes to remove the tube. What a waste.
Oh well.
I clamped the hoses together and I'm done.
Stefanie thinks my hose looks sad but it did the job well and did not get stuck.
Here are a few pics of the Mashtun in action.


Sunday, March 6, 2011
My First Beer Recipe
Brewday is coming up fast (probably March 13th) and I'm pretty sure I have decided on my first brew. I searched many recipe databases such as ratebeer.com, hop-ville.com and brewdudes.com and narrowed my choices down to an Irish Red, a Honey Amber and a Dry Stout. I quickly ruled out the stout because even though I thoroughly enjoy a stout, I wouldn't want to drink one a day. So, a stout should be my second or third beer. It boiled down to the honey or the red so I flipped a coin and the Honey Amber came out on top. I found this recipe at ratebeer.com with only a couple modifications:
 HONEY AMBER ALE:
8 LB Domestic 2 row/ Malteurop (Malted here in Winnipeg)
1 LB Vienna
10 OZ 70 L Crystal Malt
12 OZ Biscuit Malt
8 OZ Cara Pils
2 OZ Willamette Hops
.5 OZ Mt. Hood Hops
1 LB Clover Honey
10 Gallons Spring water
Mash at 153 F
Willamette Hops at 60 mins
honey at 20 minutes
Mt. Hood at 5 minutes
6.5 gallon boil - 5.5 gallon batch
I went to the beer calculus at hopville.com, punched in the recipe and received my gravity.
OG - 1.057 ACTUAL OG - 1.060
FG - 1.014 FG - 1.004
IBU- 40.7
ABV- 5.7% ABV - 7.3
I'm almost ready - but still have to make my mash tun.
UPDATE: I brewed this recipe on March 13th and it seemed to work out alright. My mash temperature was lower than I wanted and it was very hard to get it up to the right temp. It mashed at about 146F. Other than that and a little stress and paranoia due to yeast, everything went well. The original gravity was a little higher due to the boil size was 6 G instead of 6.5 and the final batch size was 4.5 Gallons.

This is the colour of the brewed wort. I was going for an amber colour and I think I got it. The wort will clarify over time and not look as murky as it does.

This isn't a very exciting moment of brewing. While it boiled, I spent the time cleaning up the mashtun and getting the fermentor ready.

This was my brewday brew. It was quite nice, medium bodied with a nice flavour. It went down easily.
Monday, February 28, 2011
More Supplies
Today, I bought more supplies from Brewer's Direct. It's a Manitoban run business so I figured I would give them my patronage. Here's what I purchased:
Bucket Fermentor (I was told I didn't need an airlock for the primary - just put the lid on loosely)
Plastic Carboy
Air lock and bung for Carboy
Syphon combo (which I still have to figure out how to use)
Spoon
Hydrometer
Floating Thermometer
100 bottle caps
Hand capper
Sanitizer
Dextrose
Dry Malt Extract
That came to a total of $95
Stefanie (my wife) bought me a propane burner for my birthday that was $65. I still need a couple boil pots but I'm waiting on more Airmiles gift certificates so I can get a big boil pot. I will probably borrow the smaller ones from my friend.
After that, a cooler to modify into a mash would be my next purchase. So far it looks like the gear is going to cost about $200. I think the cost per beer at first will be about $4.50. Fairly pricey but I need to stay committed to make it worthwhile.
Sunday, February 20, 2011
Making a Wort Chiller
I recently cashed in some of my Airmiles and ordered a $40 gift certificate from Rona.
Off I went to purchase supplies:
10 ft of 1/2 inch copper tubing- 23.98
sink adapter - 5.98
hose coupling - 3.99
3 hose clamps - 2.94
8 ft vinyl tubing 1/2" Inner dia- 4.64
tax - 41.53
Total - 46.51
Total minus Airmiles - 6.51

Make sure the inner diameter of the vinyl hose is the same as the the outer diameter of the copper tubing so it would be able to fit over top. I shimmied it down a couple of inches. It doesn't need to be too far down because the vinyl tubing should not be placed in the boiling water.

Find a cylindrical object to twist the copper tubing around. It will be easier to shape that way.


 It was pretty easy to make. It took about ten minutes to twist and clamp and another ten minutes to tweak it while water was spraying everywhere. You want all the clamps as tight as possible because you don't want tap water dripping into the wort. That would be awful. There was some crimping of the copper tube as I brought the bottom end to the top, but water was still able to flow freely through the unit.
Off I went to purchase supplies:
10 ft of 1/2 inch copper tubing
sink adapter - 5.98
hose coupling - 3.99
3 hose clamps - 2.94
8 ft vinyl tubing 1/2" Inner dia- 4.64
tax - 41.53
Total - 46.51
Total minus Airmiles - 6.51

Make sure the inner diameter of the vinyl hose is the same as the the outer diameter of the copper tubing so it would be able to fit over top. I shimmied it down a couple of inches. It doesn't need to be too far down because the vinyl tubing should not be placed in the boiling water.

Find a cylindrical object to twist the copper tubing around. It will be easier to shape that way.


Friday, February 11, 2011
Equipment
I feel that the start-up may initially jack the price of the beer to probably 3 dollars a beer. This means I have to stay committed and make at least 3 or four batches to make it worth the money.
I will find out soon enough.
Here is the list of equipment that I need - I will include the prices once I buy the stuff. I have a chef friend that is willing to loan me some equipment at no cost so that will be a big help.
-One - 6 to 7 gallon stainless steel boil pot
-One - 3 or 4 gallon stainless steel boil pot
-Mash tun (converted camping cooler)
-Growler or large mason jar for yeast starter
-Plastic or Stainless Steel stirrers
-Food grade tubing
-2 quart juice jug
-Propane burner (people use turkey fryers but they can be pretty expensive in Canada)
-Wort Chiller (W/O a wort chiller, you're looking at an hour or so cool down time - w/ about 15 minutes)
-Two or more 6 gallon carboys
-Fermentation locks
-Siphon tubes (wine thief)
-Hydrometer
-Thermometers
-Bottles (not going down the keg route right now)
-Bottle caps
-Bottle capper
Wednesday, February 9, 2011
The Beginning

I have a notebook that I will be writing everything down in as backup. Actually, this blog is more of a backup than the notebook. I can't take my computer to the home brewing store and it would be harder to do a quick reference in regards to recipes and such. So, the notebook is my beer bible and this blog is to help me reinforce what I've learned.
I plan to cook my first batch in early to mid-March and I will update this blog before that date as much as possible. I am also going to try to do this as cheaply as I can. A 12 pack of decent beer is about $22.00 here in Manitoba, breaking it down to about $1.85 per beer. I know there is cheaper stuff out there but me and my wife enjoy good beer. We like to have a beer after the boys go to sleep for the night. Unfortunately, that's starting to get very expensive. I will be writing down how much money I am spending on equipment and ingredients to see if this is actually worth the effort. However, I am learning a lot, so right now, it is worth the effort.
Comments will be greatly appreciated.
Subscribe to:
Posts (Atom)